- Audio quality shapes how professional your channel feels — viewers forgive weak video far sooner than bad sound
- There is no single best microphone; the right type depends on your content style, room, and budget tier
- USB condensers suit desk tutorials, dynamics handle noisy rooms, lavaliers fit interviews, and shotguns excel for vlogging
- USB is the easiest starting point, while XLR unlocks higher quality once you are ready to scale
- Buy at the tier that matches your current content, then upgrade only when a real limitation holds you back
Ask any seasoned creator what separates an amateur YouTube channel from a professional one, and surprisingly few will say the camera. They will say the sound. With more than 2.7 billion monthly active users and over a billion hours of video watched every day, YouTube is crowded with content that looks good. What keeps people watching — and what makes a channel feel trustworthy — is audio that is clean, clear, and easy on the ears.
The trouble is that microphones are confusing. Walk into the world of creator audio and you are bombarded with terms like condenser, dynamic, cardioid, lavalier, shotgun, XLR, phantom power, and more. It is easy to overspend on the wrong tool, or to grab a mic that simply does not match the way you actually film.
This guide cuts through that noise. Instead of chasing specific products, we will focus on the microphone types that matter for YouTube, what each one is genuinely good at, and which setup — desk, talking-head, vlog, or interview — each one suits. Then we will map those types to clear budget tiers so you can choose with confidence.
By the end, you will be able to look at your own channel, your room, and your wallet, and know exactly which kind of microphone deserves your money in 2026.
Why Audio Matters More Than Video
It feels backwards on a video platform, but for most channels audio is the higher-priority upgrade. Human ears are remarkably unforgiving. A slightly soft or grainy image reads as a stylistic choice, but hiss, room echo, and muffled speech read as carelessness — and they make viewers click away fast.
That early drop-off matters more than ever. YouTube's 2026 recommendation system optimizes for viewer satisfaction and retention, weighing how well a video holds attention rather than raw watch time. When poor audio drives people away in the first few seconds, it sends a signal that your content is not worth promoting, and your reach suffers across the board.
Good audio does the opposite. It feels effortless to listen to, which keeps viewers in their seats and quietly tells them you take your work seriously. That perception of professionalism builds the trust that turns first-time viewers into subscribers.
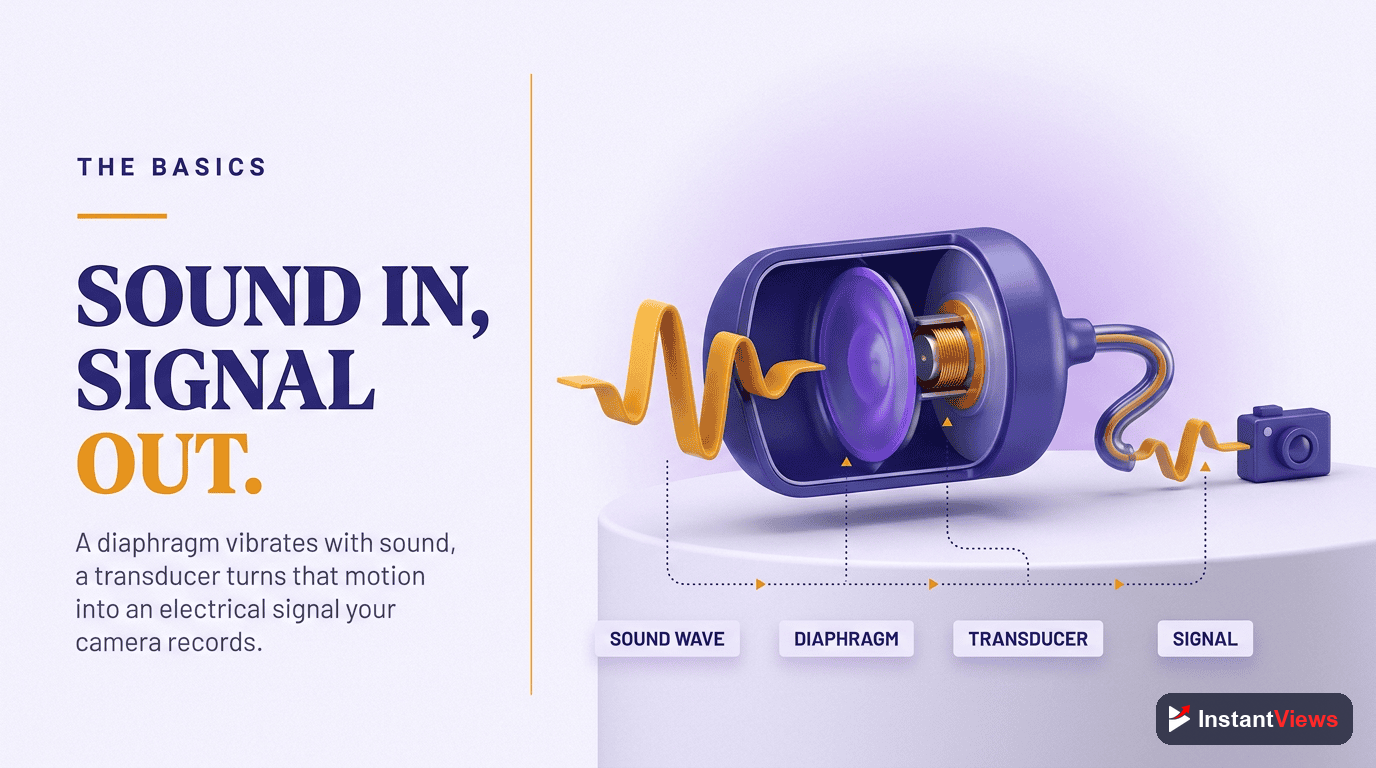
How Microphones Work: The Basics
You do not need an engineering degree, but a few concepts make every buying decision clearer. The two ideas that matter most are the type of capsule and the polar pattern.
Condenser vs Dynamic Capsules
A condenser capsule is highly sensitive and captures fine detail and the full warmth of a voice. That sensitivity is a gift in a quiet, acoustically treated room and a curse in a noisy one, because it picks up keyboard clatter, traffic, and echo just as eagerly as your voice. A dynamic capsule is less sensitive, naturally rejecting much of the room around it for a focused, radio-style sound — which is why it thrives in untreated, real-world spaces.
Polar Patterns
The polar pattern describes the directions a mic listens to. The one to know is cardioid, which captures sound from the front and rejects the rear — ideal for a single speaker facing the mic. Tighter patterns, such as the supercardioid found in shotgun mics, focus even more narrowly to isolate a voice from a busy environment.
Sensitivity and Distance
Every mic sounds better when used at the distance it was designed for. Desk condensers want to be close, dynamics reward getting in tight, and shotgun mics are built to reach across a short gap from a camera. Matching the mic to your working distance is half the battle. A dynamic mic held a foot away will sound thin and distant, while the same mic a few inches from your mouth sounds full and broadcast-ready. The mic has not changed — only how you used it.
Why This Matters Before You Buy
Understanding capsule, pattern, and distance saves you from the most expensive mistake in creator audio: buying the wrong tool for your reality. A sensitive condenser is not better than a dynamic in absolute terms — it is only better in the right room. Once you can name what your space and your style need, the shortlist of suitable microphones shrinks dramatically, and the decision stops feeling overwhelming.
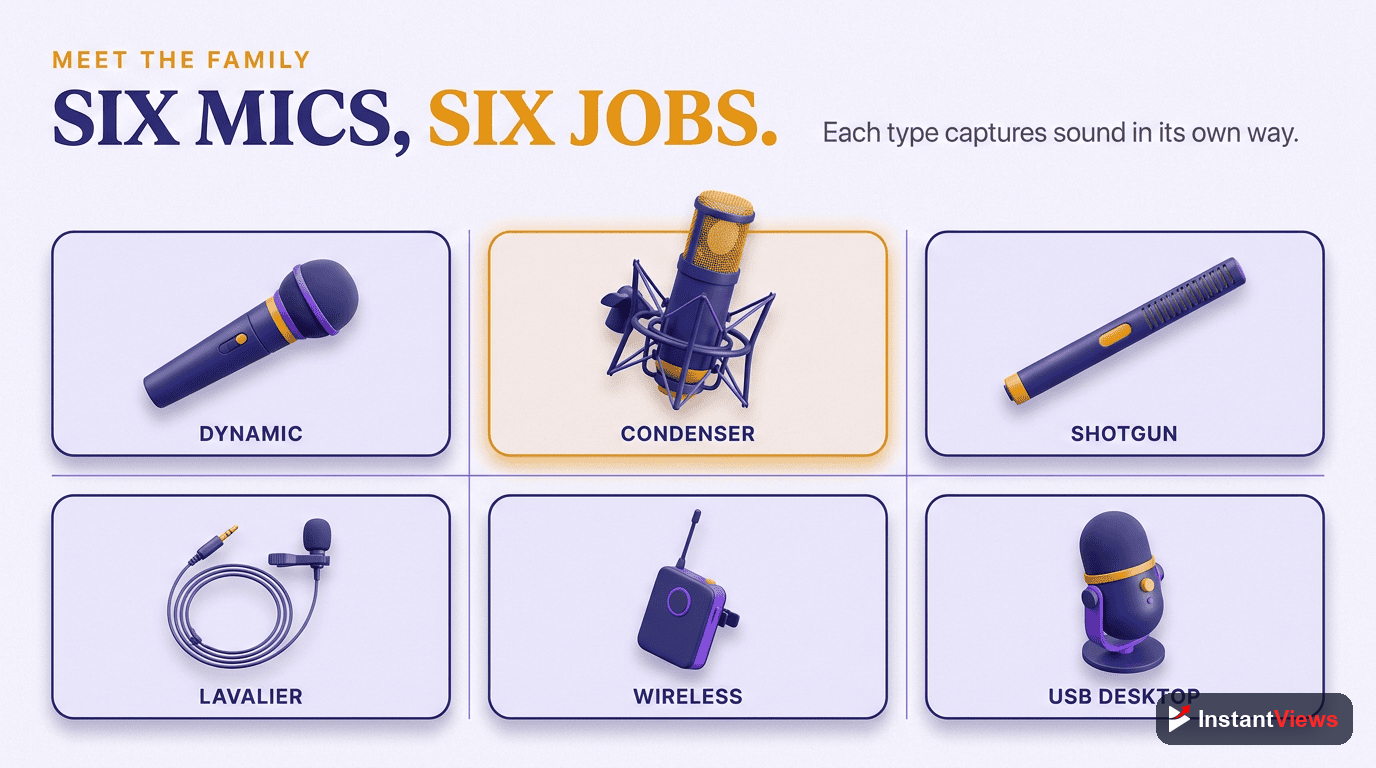
The Six Microphone Types for Creators
Almost every creator microphone falls into one of six categories. Here is what each is for.
1. USB Condenser
The default starting point for most creators. A USB condenser plugs straight into your computer, needs no extra equipment, and delivers clean, detailed sound out of the box. It is purpose-built for someone sitting at a desk talking into a screen, which describes the majority of tutorials, commentary, and webcam-style videos.
2. XLR Condenser
The same detailed, sensitive capture as a USB condenser, but with a professional XLR connection that routes through an audio interface or mixer. This unlocks better preamps, more control, and the ability to run several mics at once. It rewards a treated room and a creator ready to grow into a more capable setup.
3. Dynamic Microphone
The workhorse of broadcasters and podcasters. A dynamic mic shrugs off background noise and gives a warm, intimate, close-up sound. If your room is noisy, untreated, or shared, a dynamic is often the single most reliable way to sound professional without rebuilding your space.
4. Lavalier (Lapel) Microphone
A tiny mic that clips to your clothing near the chest. Because it travels with you, it keeps your voice level steady whether you turn your head or walk around. Lavaliers are a staple of interviews, presenting, and any video where the speaker should be heard clearly but not seen holding a mic.
5. Shotgun Microphone
A highly directional mic that mounts on or near the camera and captures whatever it is pointed at while rejecting sound from the sides. Shotguns are the go-to for on-camera vlogging and run-and-gun shooting, where you want a simple setup that follows the action without a mic in the frame.
6. Wireless System
Not a capsule type so much as a delivery method: a transmitter and receiver that cut the cable entirely. Modern wireless systems, often paired with a lavalier-style clip-on, give you broadcast-quality audio with freedom to move — perfect for vlogging, walk-and-talks, and multi-person shoots away from a desk.
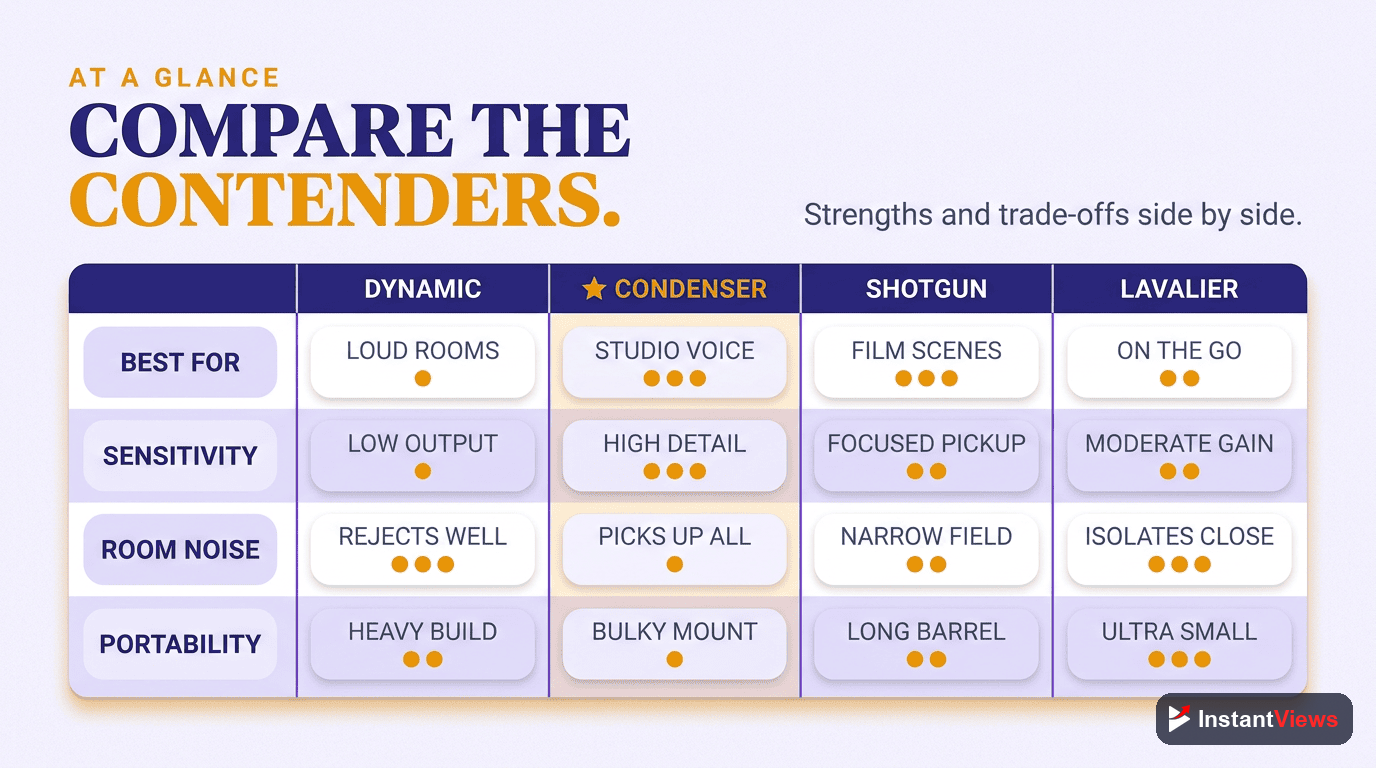
Microphone Types Compared
The table below summarizes where each type fits, so you can spot your situation at a glance.
| Mic Type | Best For | Pros & Cons |
|---|---|---|
| USB Condenser | Desk tutorials, commentary, streaming, beginners | Plug-and-play and detailed sound; but picks up room noise and ties you to one computer |
| XLR Condenser | Treated studios, voiceover, creators scaling up | High ceiling and flexible; but needs an interface and a quiet, treated room |
| Dynamic | Noisy or untreated rooms, podcasts, close talking | Rejects background noise with a warm sound; but needs strong gain and close positioning |
| Lavalier | Interviews, presenting, walk-and-talk | Consistent and hands-free; but can catch clothing rustle and is easy to misplace on-frame |
| Shotgun | On-camera vlogging, run-and-gun, B-roll | Simple, directional, stays out of frame; but room acoustics still affect distant sound |
| Wireless | Moving subjects, field shoots, multi-person | Cable-free freedom and mobility; but adds batteries, cost, and potential interference |
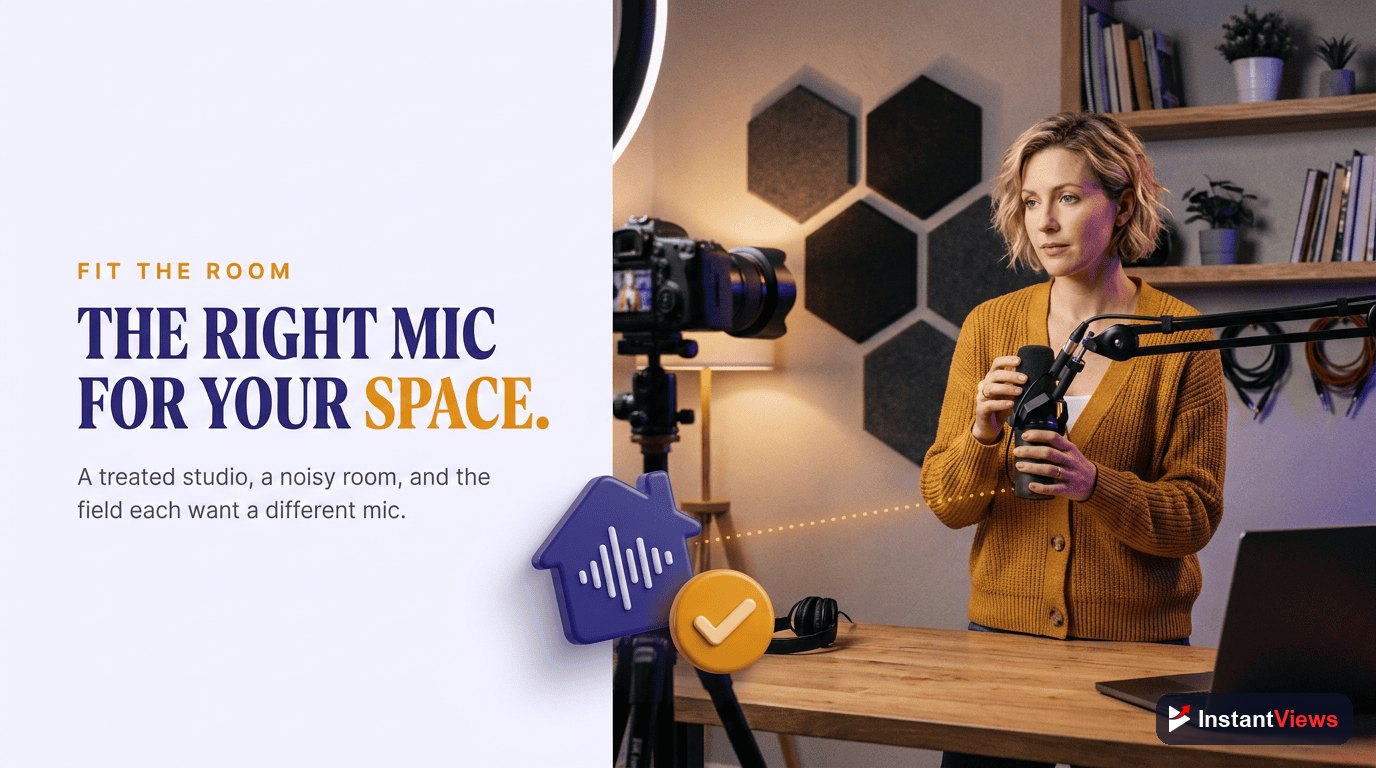
Matching the Mic to Your Setup
The fastest way to choose is to start from how you actually film, not from a spec sheet. Here are the four most common creator setups and the mic types that fit each.
The Desk Setup (Tutorials & Commentary)
If you sit at a desk talking to a screen — explainer videos, software tutorials, reaction content, gaming — a USB condenser is the natural first choice for its clean sound and zero-fuss setup. If your room is noisy or echoey, a dynamic mic on a boom arm is the smarter pick because it ignores most of the space around you.
The Talking-Head Setup (On-Camera, Seated)
For polished, sit-down videos facing a camera, you want clean voice without a mic dominating the frame. A shotgun mic mounted just out of shot or a discreet lavalier both work well, keeping the focus on you while delivering professional audio.
The Vlog Setup (Moving, Outdoors)
When you are moving, walking, or filming outdoors, cables and fixed mics become a liability. A camera-mounted shotgun handles run-and-gun simplicity, while a wireless lavalier gives the most consistent voice as you move and the environment changes around you.
The Interview Setup (Two or More People)
Interviews demand that every voice be captured clearly and independently. Lavaliers on each speaker, ideally wireless, are the classic solution. For seated, in-studio interviews, a pair of dynamic mics can deliver a richer, more controlled sound.
Do not buy a mic for content you only imagine making. Choose for the videos you actually publish today. A pro-grade interview kit gathers dust if you only ever record solo tutorials at a desk — and the money would have been better spent treating your room.
USB vs XLR: Which Connection?
One decision trips up more creators than any other: USB or XLR. They are not better or worse, just suited to different stages.
When USB Wins
USB microphones convert sound to digital inside the mic and plug directly into your computer. There is nothing else to buy, learn, or balance — you connect it and record. For a solo creator at a desk, USB is faster, cheaper, and perfectly capable of clean, professional audio.
When XLR Wins
XLR microphones send an analog signal into an audio interface or mixer, which then feeds your computer. That extra box adds cost and a small learning curve, but it gives you better preamps, finer control, and room to grow — running multiple mics, upgrading components, and building a setup that lasts for years.
The Hybrid Middle Ground
Some microphones offer both USB and XLR outputs. These are a smart bridge for creators who want to start simple on USB today and switch to an XLR interface later without buying a new mic. If you are unsure which path you will take, a hybrid keeps your options open.
Make Every Video Count
Great audio gets viewers in the door — great titles, tags, and topics keep them coming. Explore our free suite of YouTube tools to research, optimize, and analyze what is working.
Explore Free YouTube Tools →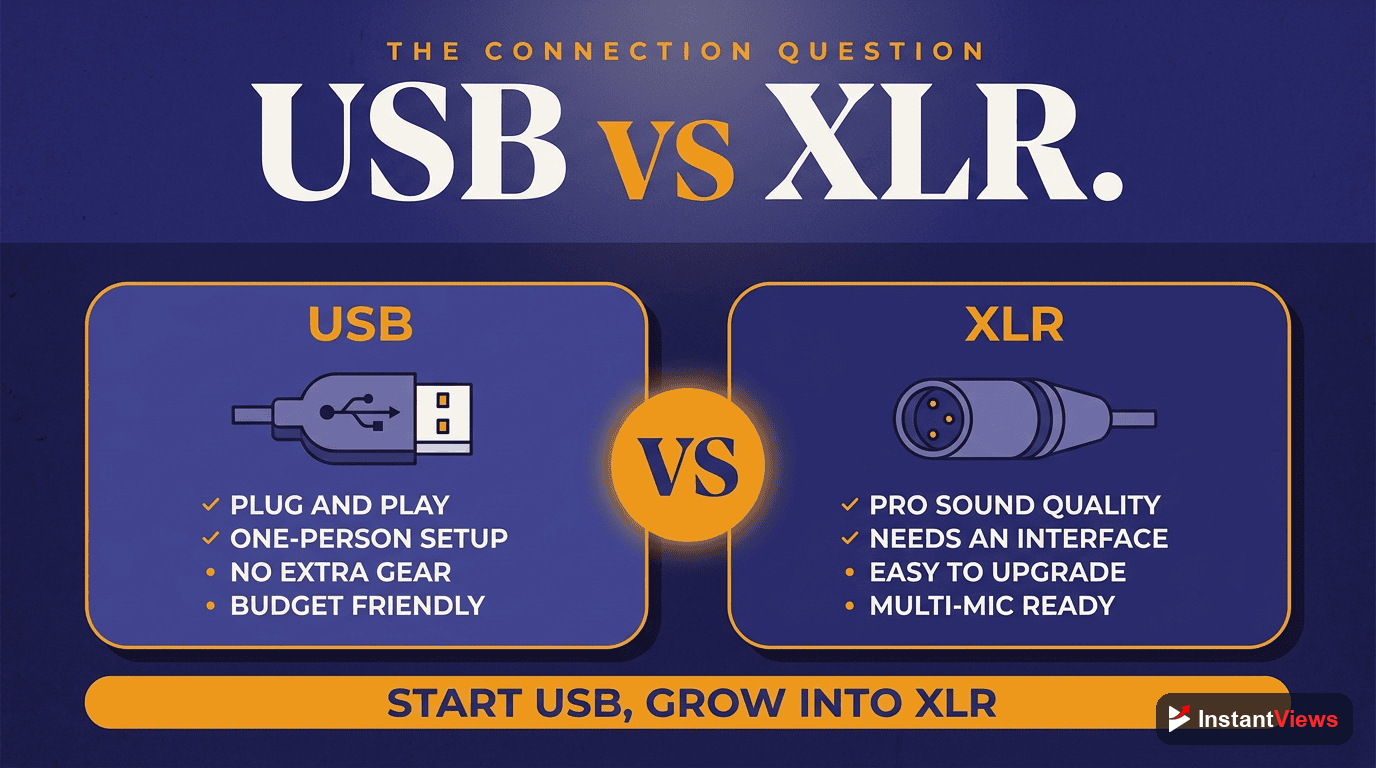
Choosing by Budget Tier
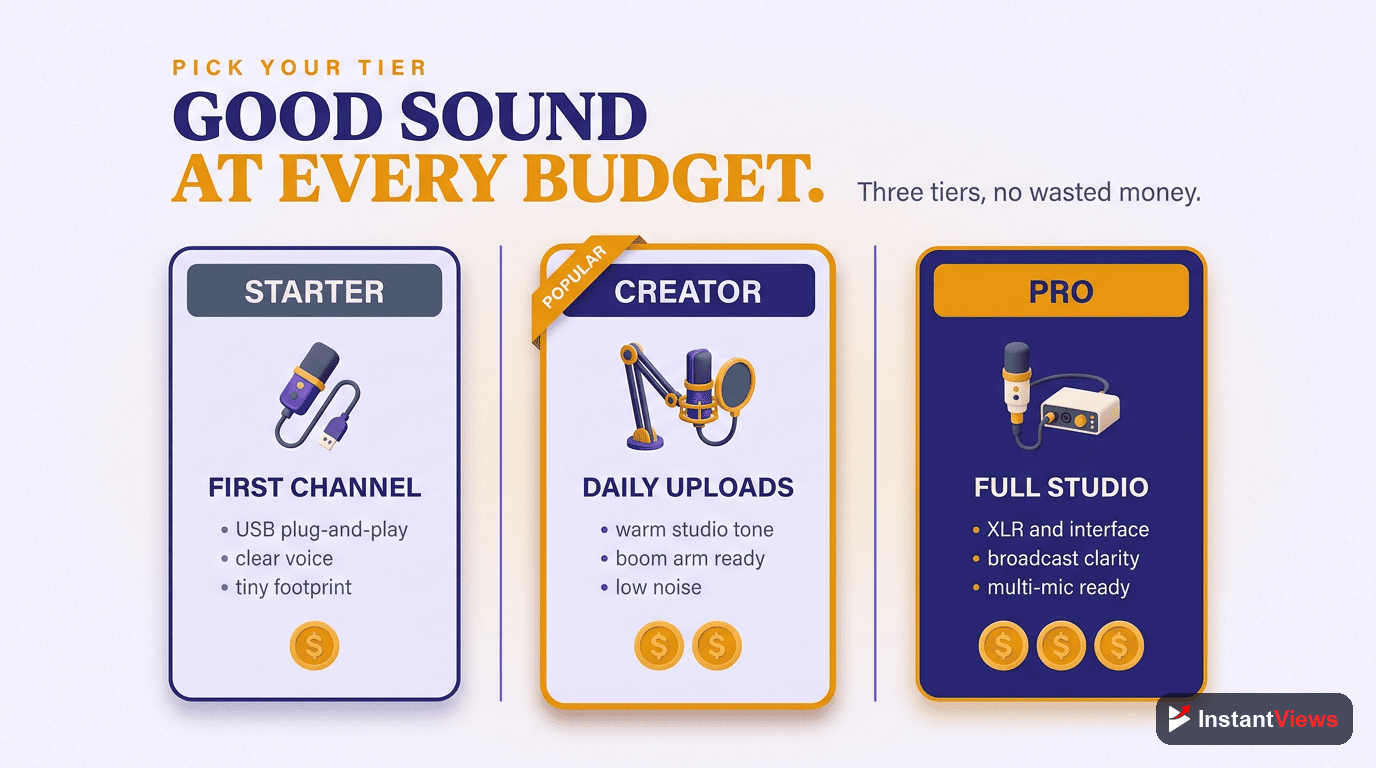
Once you know your type and connection, budget is the final filter. Rather than chase prices that change constantly, think in three tiers and what each one realistically delivers.
Entry Tier
At the entry level you are buying clean, watchable audio — a clear voice free of obvious hiss, recorded simply. Expect plug-and-play USB condensers and affordable dynamics or basic lavaliers. This tier is more than enough to start a channel and sound dramatically better than a built-in laptop or camera mic.
Mid Tier
The mid tier buys consistency and refinement: better noise rejection, richer tone, more durable build, and accessories like shock mounts and pop filters. Hybrid USB/XLR dynamics and capable wireless lavalier systems live here. This is the sweet spot for growing creators who publish regularly and want their audio to feel unmistakably professional.
Pro Tier
At the pro tier you are paying for broadcast-grade results and reliability — the nuance, headroom, and build quality that hold up under scrutiny and in demanding shoots. This means studio XLR condensers, premium shotgun mics, and professional wireless kits. It is the right investment when audio is core to your brand and a limitation at a lower tier is actively costing you quality.
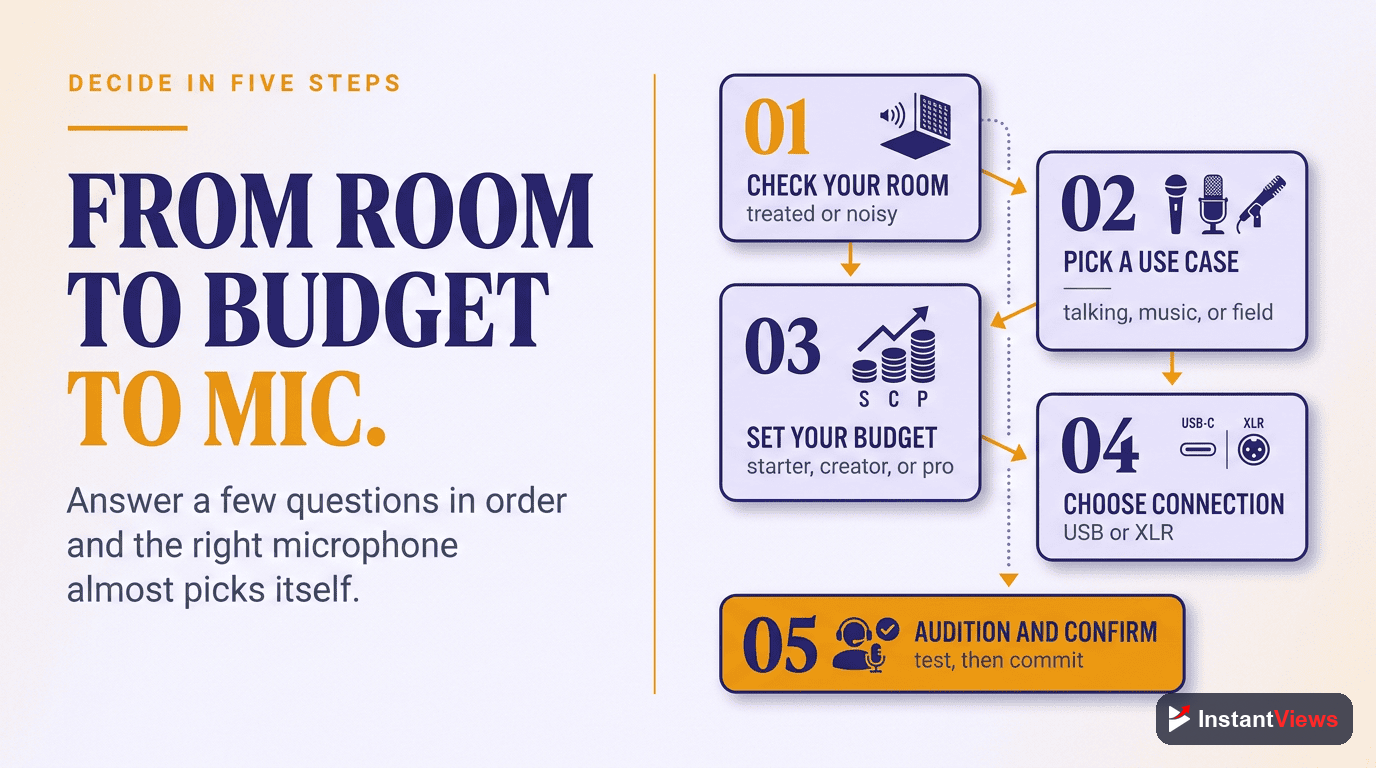
How to Choose: Step by Step
Put it all together with this simple sequence.
Define Your Content Style
Be honest about the videos you actually make — desk tutorials, talking-head, vlogs, or interviews. Your style points directly at the mic types worth considering.
Assess Your Room
Listen to your space. Is it quiet and soft, or noisy and echoey? A treated room favors a sensitive condenser; a noisy one calls for a dynamic mic that rejects its surroundings.
Pick USB or XLR
Choose USB for instant simplicity on one computer, or XLR with an interface if you plan to scale. When in doubt, a hybrid mic keeps both paths open.
Set Your Tier
Match your spend to your current needs across the entry, mid, and pro tiers. Buy where your content lives now rather than overspending on capability you will not use yet.
Test and Position
Record short test clips, get the mic close and slightly off-axis, add a pop filter, and tame your room. Good technique can make an affordable mic outperform a careless expensive one.
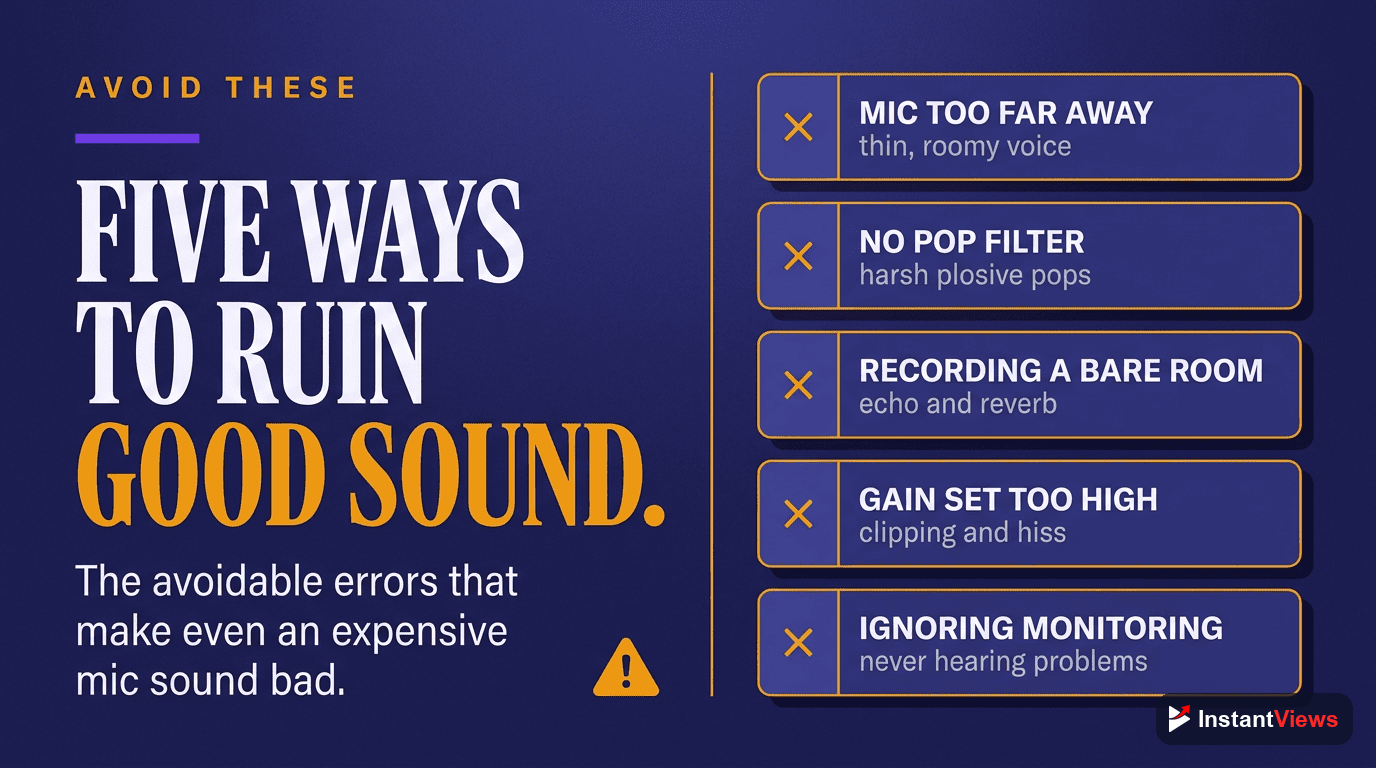
Common Mistakes to Avoid
Even creators with great gear undermine their audio in predictable ways. Watch for these:
- Buying the wrong type: A sensitive condenser in a noisy room, or a fixed desk mic for a moving vlog, fights your setup instead of helping it.
- Ignoring the room: A modest mic in a treated space beats a premium mic in a bare, echoey room. Soft furnishings and a smaller space often help more than spending.
- Recording too far away: Distance lets the room creep in. Getting closer to the mic is the simplest fix for thin, hollow sound.
- Skipping a pop filter: Harsh plosives on "p" and "b" sounds are distracting and entirely avoidable with a cheap filter or foam windscreen.
- Overspending too early: Pro gear will not fix beginner technique. Master positioning and room control first, then upgrade when a real limitation appears.
- Forgetting to monitor: Not listening back as you record means you discover problems only in the edit, after the moment has passed.
"Viewers do not consciously notice great audio — they just keep watching. They absolutely notice bad audio, and they leave. The microphone is the cheapest professional upgrade most creators ever make."
Frequently Asked Questions
There is no single best mic — the right type depends on your setup. A USB condenser is ideal for desk-based talking-head videos and tutorials, a dynamic mic suits untreated or noisy rooms, a lavalier is best for interviews and presenting, and a shotgun mic shines for on-camera vlogging. Match the mic to how and where you record.
USB microphones are better for beginners because they plug straight into a computer with no extra gear and deliver clean audio out of the box. XLR microphones offer higher ceilings for quality and flexibility but require an audio interface or mixer, so they make more sense once you are scaling toward a professional, multi-mic setup.
Viewers will forgive imperfect video far more readily than bad audio. Hiss, echo, and muffled sound make a video feel amateur and cause people to click away within seconds, which hurts retention. Clear audio signals professionalism and keeps viewers watching, so for most creators a good microphone is a higher-priority upgrade than a better camera.
A condenser mic is highly sensitive and captures rich detail, which sounds great in a quiet, treated room but also picks up background noise and echo. A dynamic mic is less sensitive and naturally rejects room noise, giving a warm, focused sound that works well in untreated spaces. Choose a condenser for controlled rooms and a dynamic for noisy ones.
Both work, but they suit different styles. A lavalier (lapel) mic clips to your clothing and keeps your voice consistent as you move, which is great for walk-and-talk and presenting. A shotgun mic mounts near the camera and captures whatever it is pointed at, which is simpler for run-and-gun shooting. Many vloggers use a wireless lavalier for the most reliable results.
You can get clean, watchable audio at the entry tier, a noticeable step up in clarity and consistency at the mid tier, and broadcast-grade results at the pro tier. Most creators are best served buying at the level that matches their current content and upgrading only when a specific limitation, such as room noise or multi-person recording, starts holding them back.
Yes. Recording in a smaller, soft-furnished room reduces echo, getting the mic closer to your mouth improves clarity, and using a pop filter and basic noise reduction in editing cleans up the rest. Good technique often makes an affordable mic sound better than an expensive one used carelessly in a bad room.
A wireless system is worth it if you move around while filming, shoot interviews, or record away from a desk, because it removes cables and keeps audio consistent on the go. If you record seated at a fixed desk, a wired USB or XLR mic will usually give you better value and slightly cleaner sound for the money.
Conclusion
The best microphone for your YouTube channel is not the most expensive one — it is the one that fits how you film, the room you film in, and the budget you have today. Start from your content style, respect your acoustics, and the right type almost chooses itself.
For most creators the path is clear: a USB condenser or dynamic mic for desk work, a lavalier or shotgun for on-camera and vlogging, and a wireless system once you start moving or recording multiple voices. Buy at the tier that matches your current videos, and let real limitations — not gear envy — drive your next upgrade.
Get this one decision right and everything downstream improves. Clean, confident audio keeps viewers watching, signals professionalism, and quietly earns the trust that turns casual viewers into loyal subscribers — long after they have forgotten what camera you used.