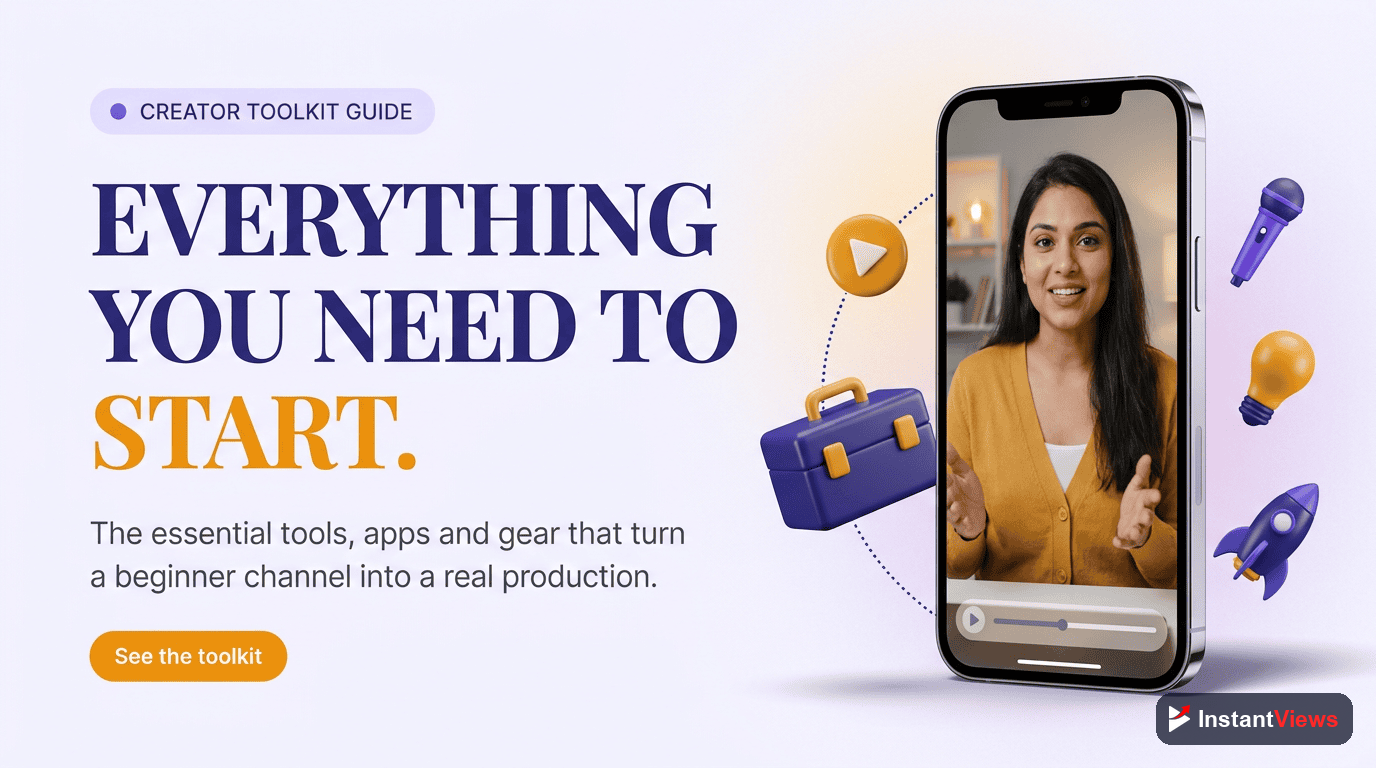
- You do not need expensive gear to start — a modern phone shoots excellent video, so begin with what you already own
- Audio matters most for perceived quality; a modest microphone upgrade beats an expensive camera every time
- Editing software comes in clear tiers — free tools are enough for years, and you only pay when a real limitation slows you down
- Thumbnails, keyword research, and analytics decide whether your videos get found and watched, and the best starter tools for all three are free
- Build a lean starter setup first, then upgrade one thing at a time as your channel and skills grow
Search "YouTube gear" and you will be buried under camera bodies, lens charts, microphone shootouts, and lighting kits that cost more than a used car. It is easy to conclude that you need to spend thousands of dollars before you can press record. That belief stops more channels than any algorithm ever will.
The truth is the opposite. With more than 2.7 billion monthly active users and over a billion hours watched every day, YouTube rewards consistency, clarity, and ideas — not price tags. Some of the most-watched creators on the platform built their audiences with a phone, a cheap microphone, and free editing software. The gear caught up later, after the channel was already working.
This guide is a practical, budget-aware roundup of the tools that actually move the needle for creators in 2026, organized by category: camera and video, audio, lighting, editing software, thumbnails, keyword and SEO research, analytics, and organization. For each one you will see a sensible starter option, a worthwhile upgrade, and — most importantly — why it matters so you can decide what to skip.
By the end you will have a clear picture of a lean starter kit you can assemble for almost nothing, and a roadmap for upgrading one piece at a time as your channel grows. Let us begin where every creator should: with the mindset, not the shopping cart.
- Start With What You Have: The Right Mindset
- Camera and Video: Your Phone Is Enough
- Audio: The Tool That Matters Most
- Lighting: Simple, Cheap, and Transformative
- Editing Software: Free, Prosumer, and Pro
- Thumbnail Tools: Winning the Click
- Research and SEO Tools: Finding Your Topics
- Analytics: Knowing What to Fix Next
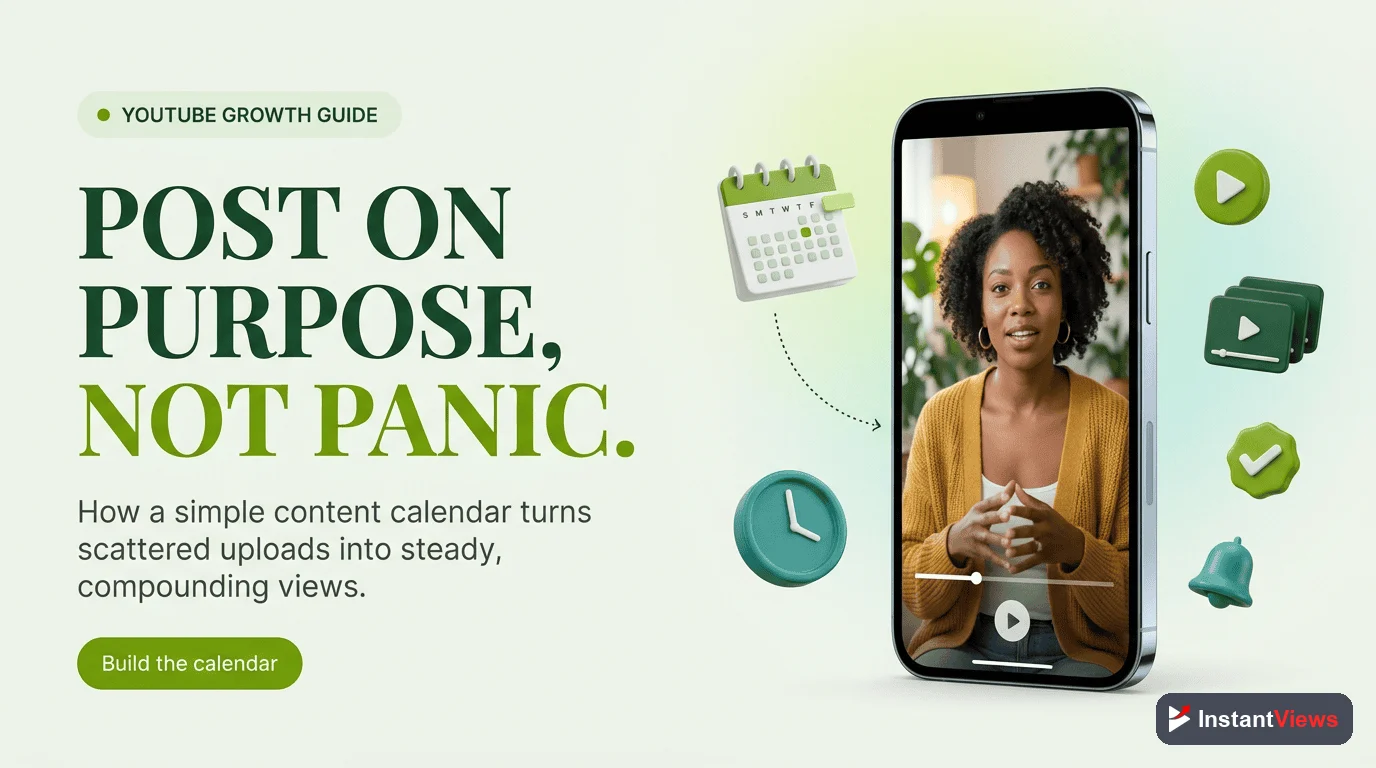
- Organization: Your Content Calendar
- Starter vs Pro: Two Complete Setups
- FAQ
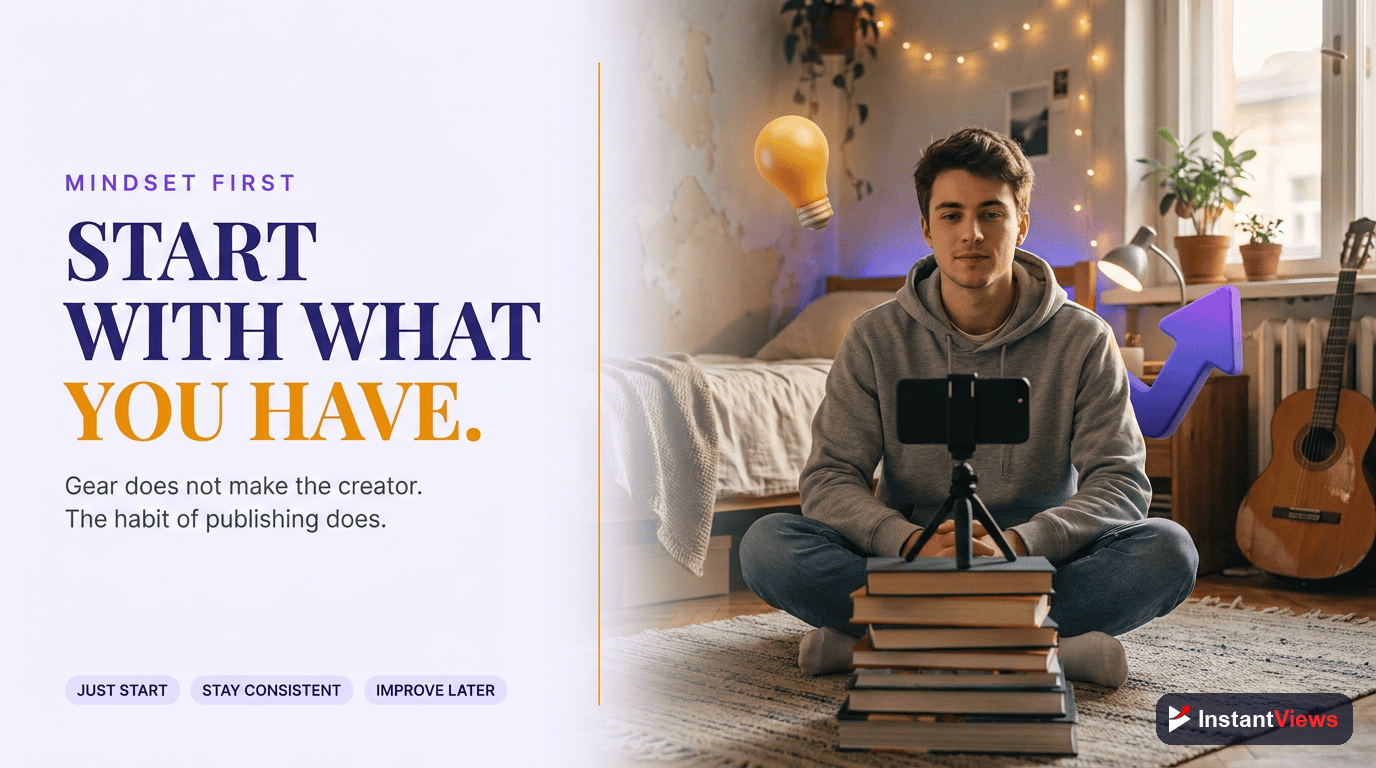
Start With What You Have: The Right Mindset
The single most expensive mistake new creators make is buying gear before they have proven they will keep showing up. A closet full of equipment does not make videos — you do. Before you spend a cent, your goal is to publish enough videos to find your voice, your niche, and an audience that responds.
This matters because the 2026 algorithm optimizes for viewer satisfaction and retention. It rewards videos people choose to keep watching, regardless of how they were filmed. A clear idea delivered with energy on a phone will beat a beautifully shot but boring video every single time. Gear improves the surface; it cannot manufacture the substance.
So adopt a simple rule: upgrade a tool only when a specific limitation is actively holding you back. If you can hear an echo you cannot fix, upgrade your audio. If editing is taking all weekend, look at faster software. If you are not bottlenecked, you do not need a new toy — you need another video.
- Publish before you purchase: prove the habit first, then invest.
- Solve the loudest problem: spend on the one thing viewers actually notice.
- Buy for where you are: not for the channel you imagine in two years.
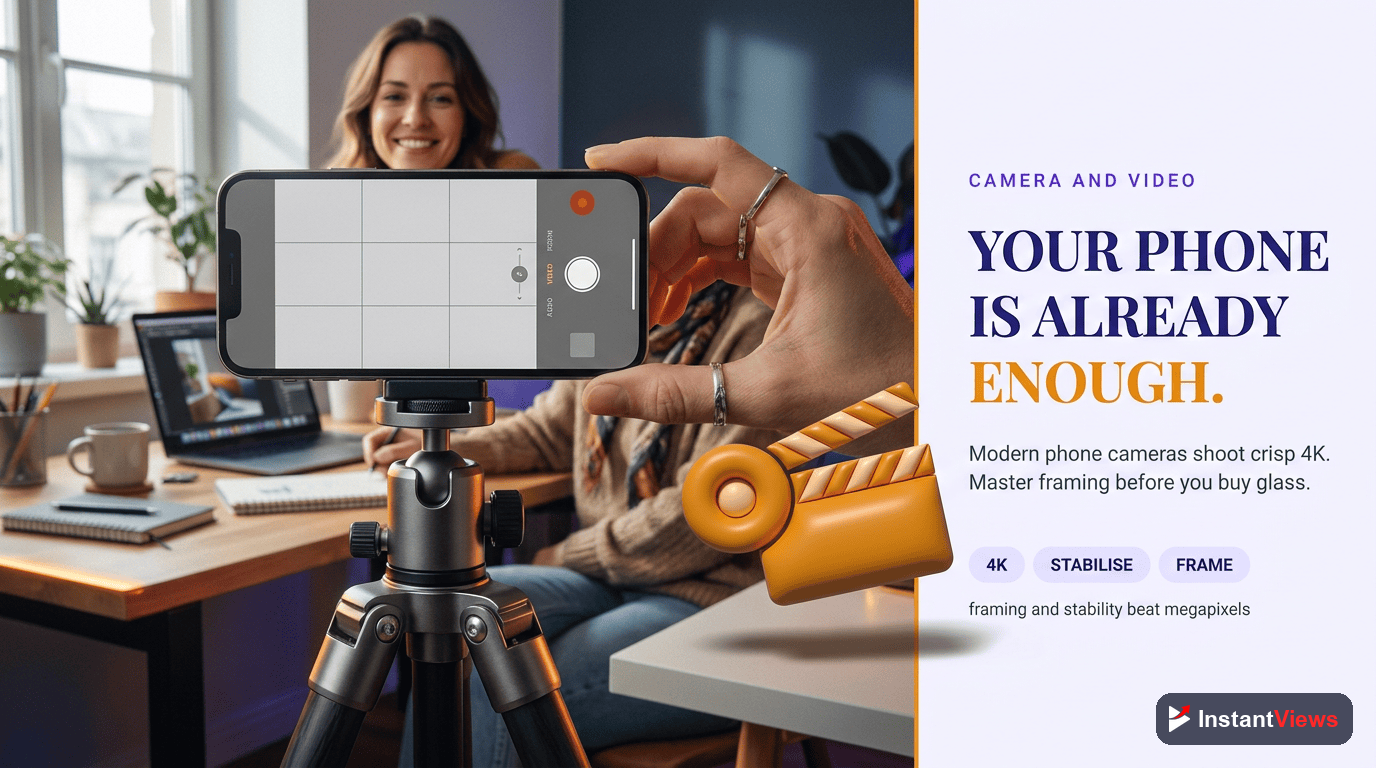
Camera and Video: Your Phone Is Enough
Here is the most freeing fact in this entire guide: the camera in your pocket is excellent. Modern smartphones record sharp, well-stabilized, high-resolution video that looks great on a TV, a laptop, or a phone screen. Countless thriving channels — in education, fitness, cooking, commentary, and more — are shot entirely on a phone, and viewers neither know nor care.
The difference between an entry-level phone and a flagship is real but small, and it almost never decides whether a video succeeds. What does matter is how you use whatever camera you have: good light, a stable shot, and locked exposure and focus so the image does not drift mid-sentence.
Getting the Most From a Phone
- Stabilize it: a cheap tripod or phone clamp removes shaky-hands distraction instantly.
- Lock exposure and focus: tap and hold on your subject so the camera stops hunting.
- Use the rear camera: it is sharper than the front-facing selfie camera on most phones.
- Shoot horizontally for long-form, vertically for Shorts: match the frame to the format.
When a Dedicated Camera Is Worth It
A standalone camera — a mirrorless body or a quality webcam for talking-head content — becomes worthwhile when you want shallow background blur, better low-light performance, or interchangeable lenses for a specific look. These are refinements, not requirements. Treat a dedicated camera as a mid-game upgrade, not a starting purchase.
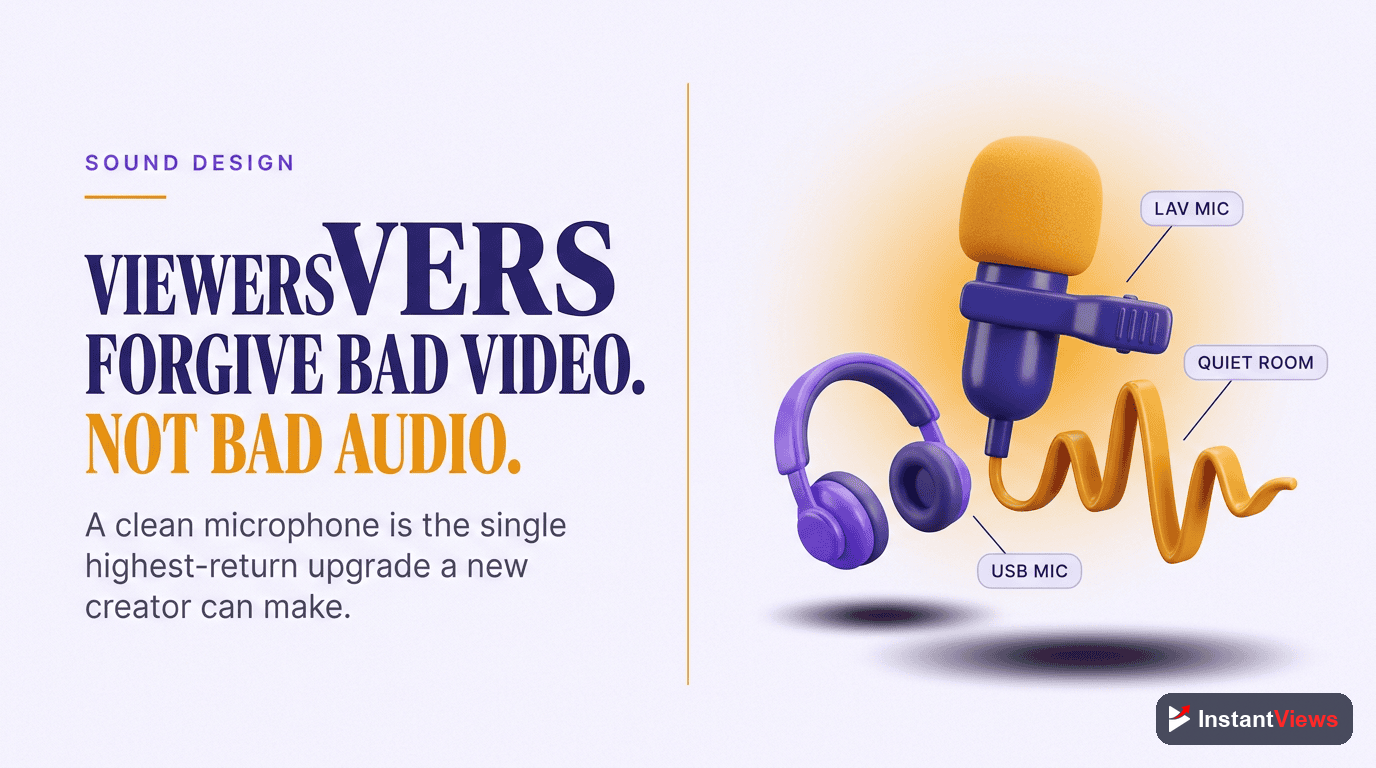
Audio: The Tool That Matters Most
If you remember one thing from this guide, make it this: audio matters more than video. Viewers tolerate slightly soft footage, but they abandon a video almost instantly when the sound is harsh, echoey, muffled, or hard to follow. Clear audio signals quality and effort to the brain before a single word is processed — which is exactly why a small microphone upgrade raises perceived production value more than a far more expensive camera.
The good news is that great audio is cheap. The two biggest improvements you can make cost very little: get the microphone closer to your mouth, and record in a quieter, softer-sounding room.
Microphone Options by Setup
- USB condenser mic: ideal for talking to camera at a desk — plug it in, point it at your face, and you sound dramatically better.
- Clip-on lavalier mic: perfect for moving around, tutorials, or vlogging; it stays close to your mouth wherever you go.
- Shotgun mic: a later upgrade for controlled studio setups where you want the mic out of frame.
Treating Your Room Costs Nothing
Echo, not the microphone, is what makes home recordings sound amateur. Record in a smaller room with soft surfaces — carpet, curtains, a sofa, a closet of clothes — which absorb the reflections that create that hollow, distant sound. You can transform your audio for free before spending anything on gear.
Bad audio cannot be fully fixed in editing. Software can reduce some background noise, but it cannot rebuild a muffled or heavily echoed recording. Always get the sound right at the source — it is the cheapest, highest-impact upgrade available to any creator.
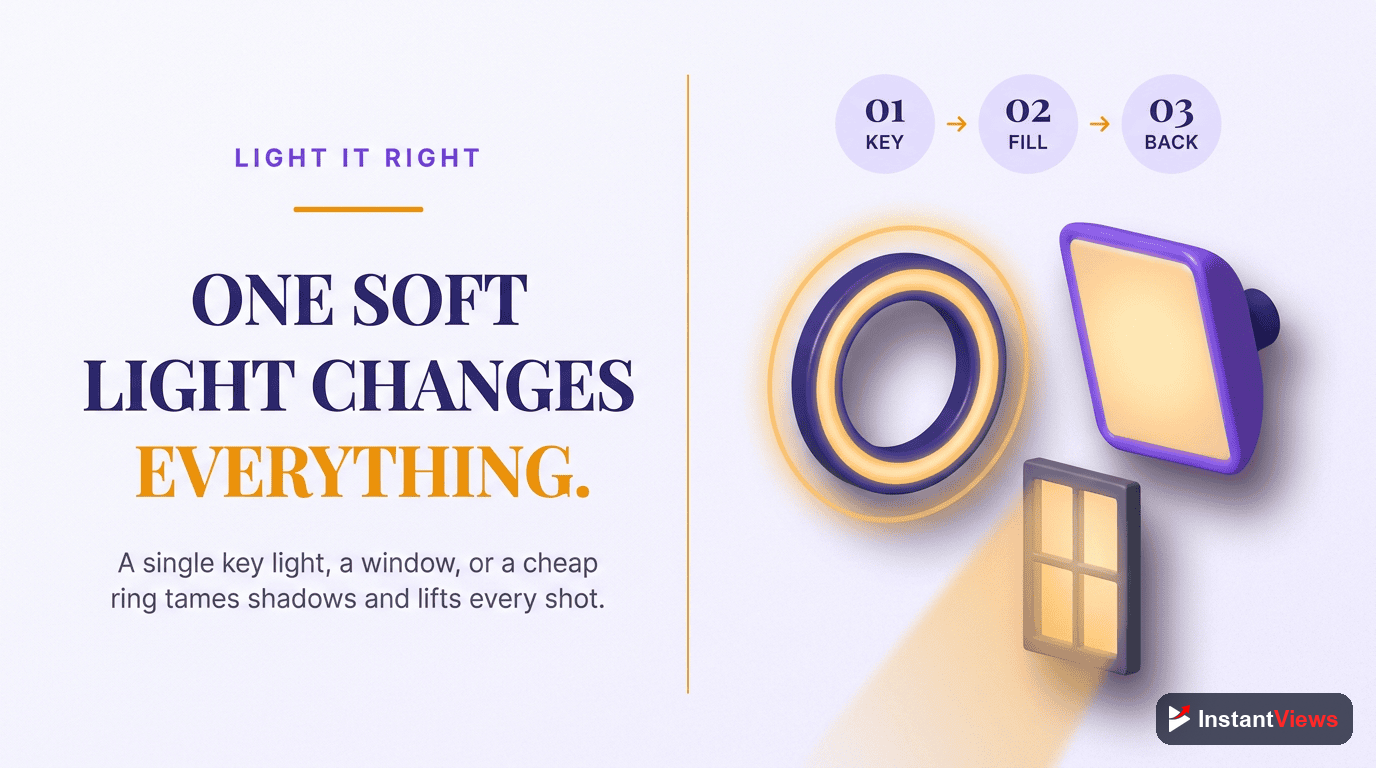
Lighting: Simple, Cheap, and Transformative
Good lighting is the quiet secret behind footage that looks "professional." It separates you from the background, removes unflattering shadows, and lets even a basic camera produce a clean, bright image. And the best light source of all is completely free: a window.
Facing a large window gives you soft, even, natural light that flatters almost everyone. The only rule is direction — the light should fall on your face, not come from behind you. A bright window or lamp behind your head turns you into a silhouette, the single most common lighting mistake new creators make.
A Simple Lighting Progression
- Free: face a window during daylight; reposition your desk if you need to.
- One light: add a single affordable LED panel or ring light as your key light for consistency at any hour.
- Two or three lights: add a fill light to soften shadows and a back light to separate you from the background once you want a polished studio look.
Notice that each step is optional. Many successful creators never go beyond one good light, because the window plus a single panel already covers the vast majority of situations.
Editing Software: Free, Prosumer, and Pro
Editing software is where creators most often overspend. The reality is that free editors are powerful enough to publish polished videos for years. Paid tiers mainly buy you speed, advanced effects, and time-saving features — not the ability to make good videos, which you already have.
It helps to think of editing software in three clear tiers, and to choose the lowest tier that does not get in your way.
| Tier | Who it is for | What you get |
|---|---|---|
| Free | Every beginner | Cutting, titles, transitions, music, and exporting — everything you need to publish professional-looking videos at no cost. |
| Prosumer | Growing creators | Faster workflows, deeper effects and color tools, and increasingly AI-assisted features like text-based editing and auto-captions. |
| Professional | Full-time and teams | Industry-standard control, advanced color and motion graphics, and tight integration with other creative software. |
In 2026, even free and prosumer editors increasingly include conversational, AI-assisted editing — trimming dead air, generating captions, and isolating the takes where you actually said something useful. These features save hours, but they are a convenience, not a prerequisite. Start free, learn the fundamentals of pacing and cutting, and upgrade only when a concrete bottleneck — render times, a missing effect, slow captioning — is genuinely costing you time.
What Actually Improves Your Edits
- Tight pacing: cut dead air and ramble to protect retention — the metric the algorithm rewards most.
- Clear captions: a large share of viewing happens muted, so on-screen text keeps people watching.
- Consistent structure: a strong hook, a clear payoff, and no filler beat any fancy transition.
Build Your Free Toolkit
Explore our free suite of YouTube tools to research topics, refine your titles and tags, and analyze what is working — no expensive software required.
Explore Free YouTube Tools →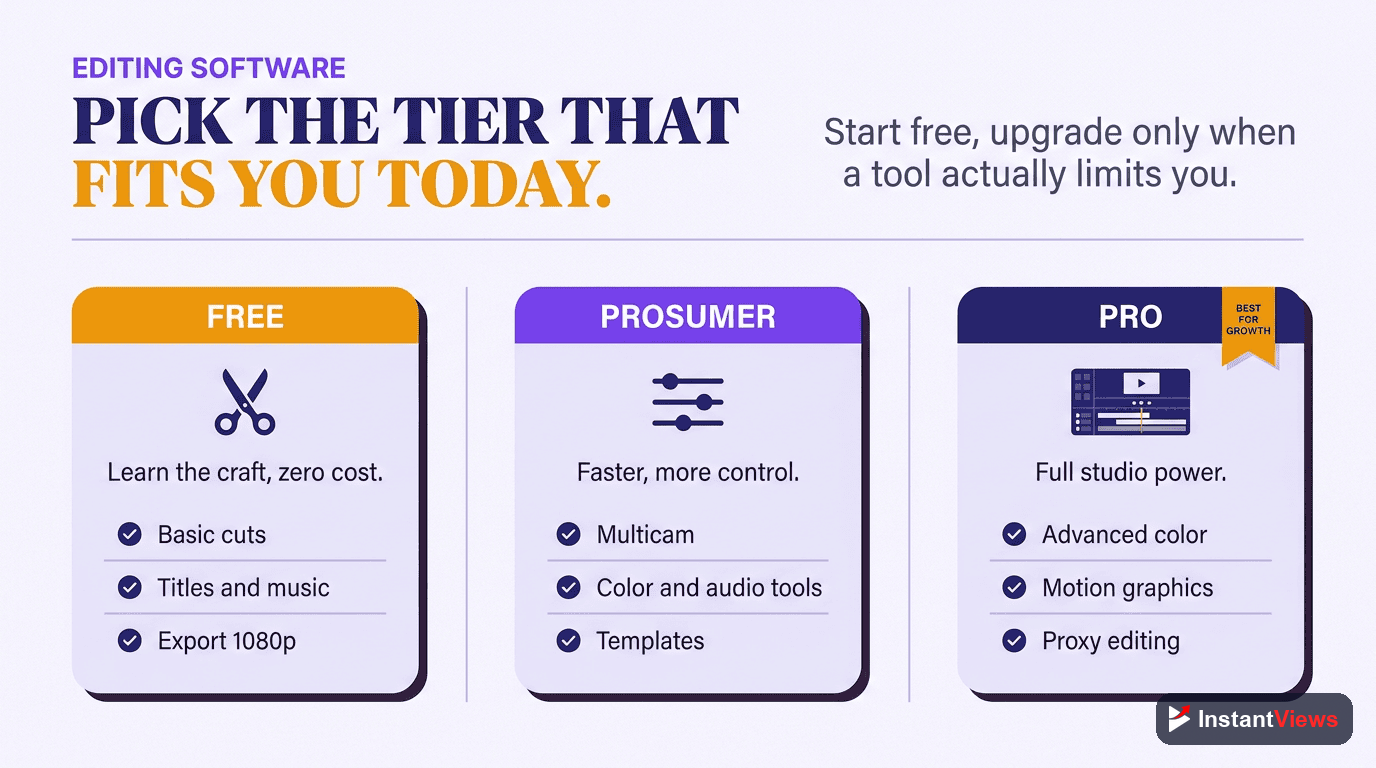
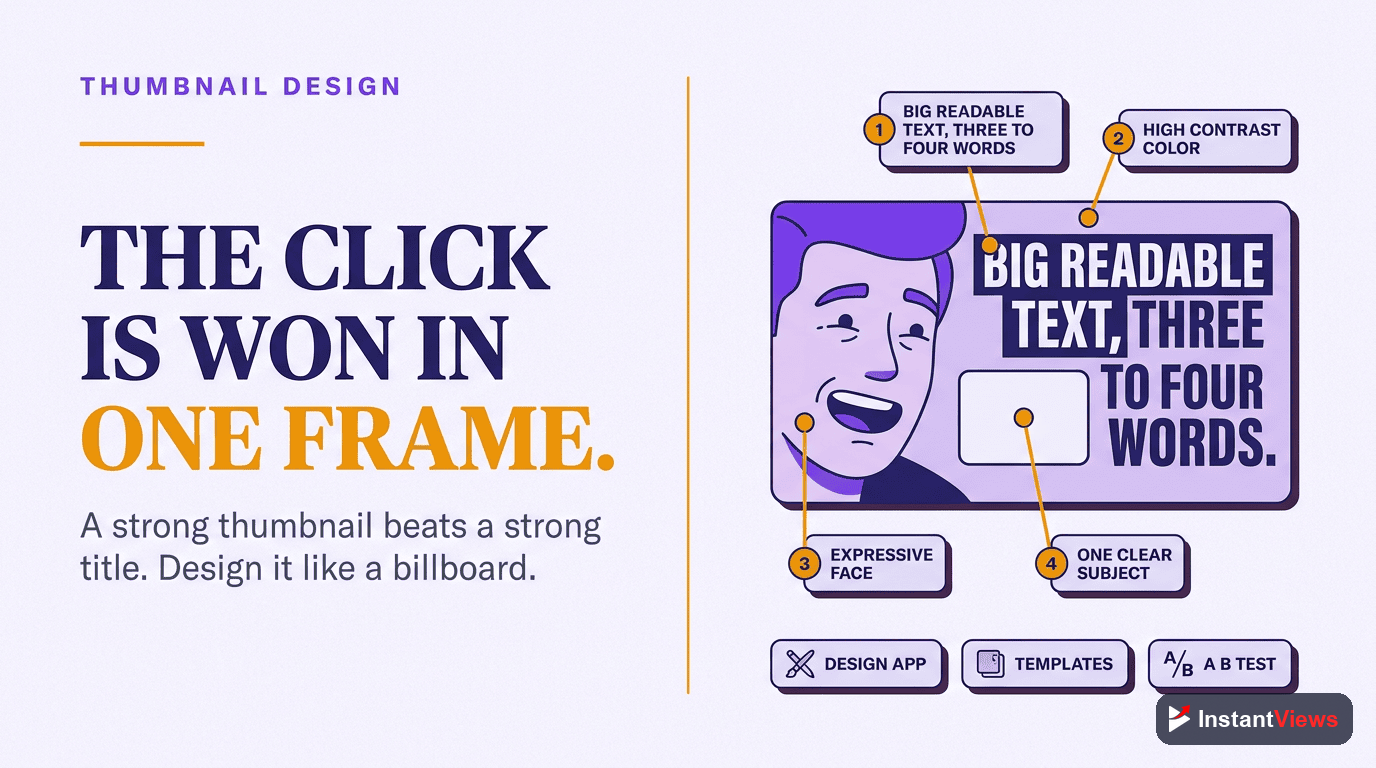
Thumbnail Tools: Winning the Click
Your thumbnail is arguably the most important asset you create, because it decides whether your impressions ever turn into views. A brilliant video with a weak thumbnail simply never gets watched. The encouraging part is that you do not need professional design software to make great ones.
A free, template-based design tool lets anyone produce bold, readable thumbnails in minutes. The design principles matter far more than the software:
- Keep it simple: one clear subject and at most a few words of large, legible text.
- Maximize contrast: your thumbnail must pop against YouTube's white background and beside competitors.
- Test legibility small: shrink it to phone size — if you cannot read it, neither can your audience.
- Stay consistent: a recognizable style helps loyal viewers spot you instantly in a crowded feed.
As you grow, AI-assisted thumbnail tools and A/B testing tools let you generate variations and measure which design actually earns more clicks. That is a refinement for when you already have traffic to test against — start with a free design tool and strong fundamentals first.
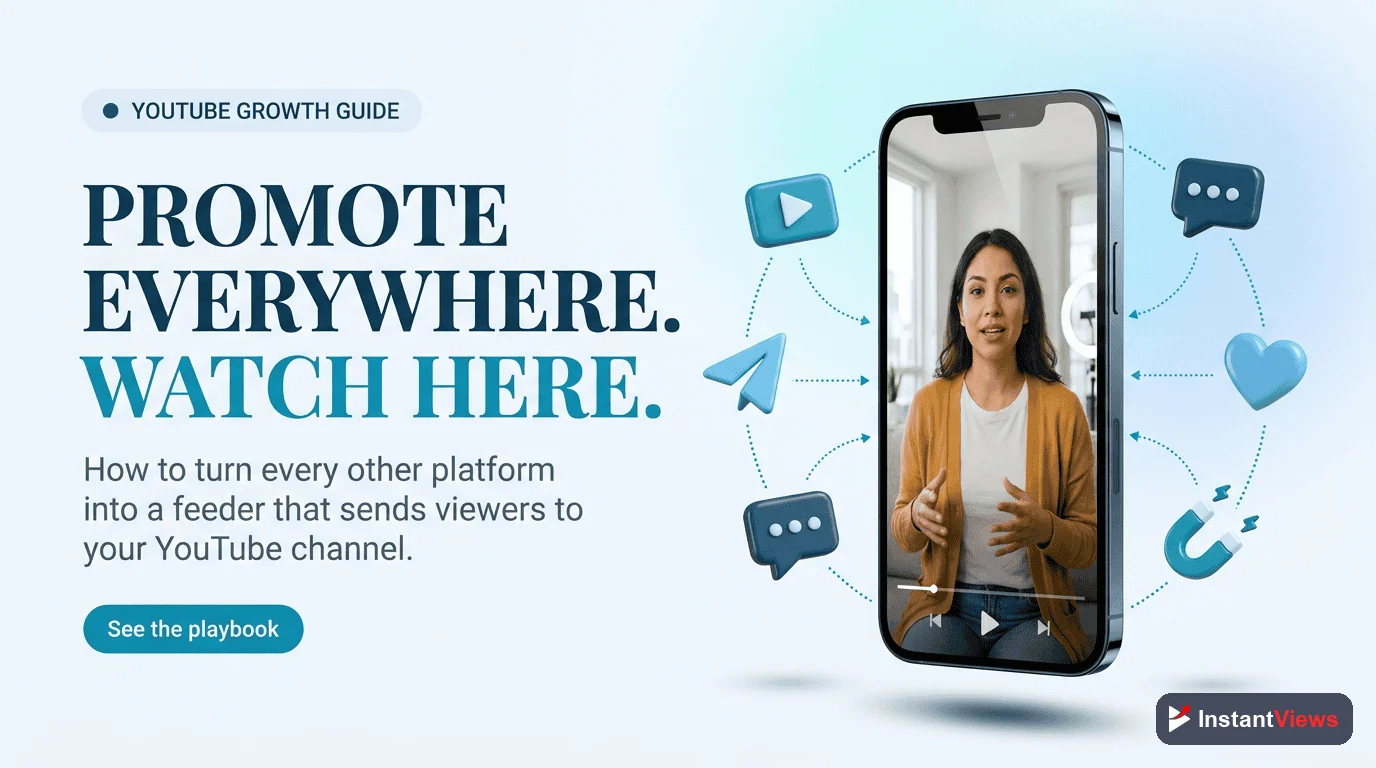
Research and SEO Tools: Finding Your Topics
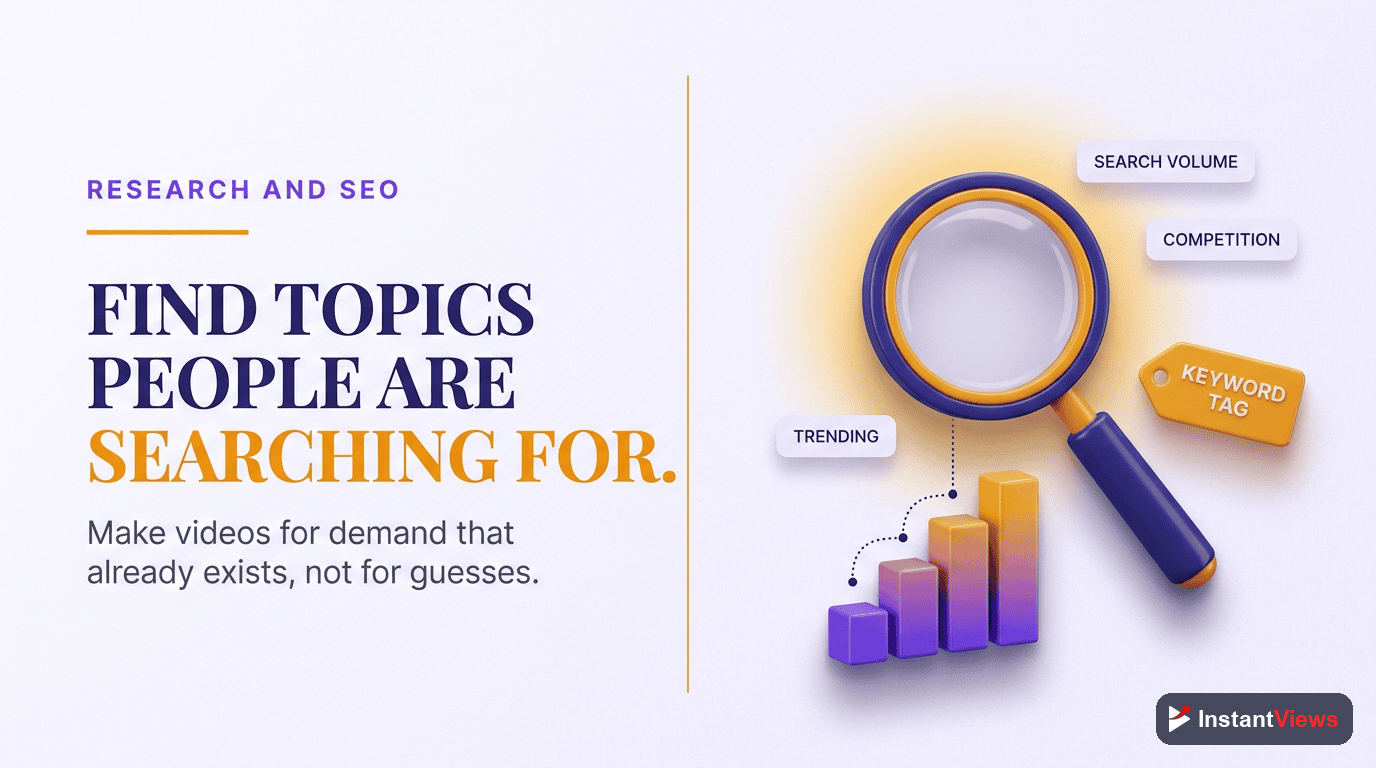
The best gear in the world cannot save a video nobody is searching for. Research tools help you choose topics with real demand and frame them with titles and tags that get found — and your most valuable research tools are free and already in front of you.
Free Research You Already Have
- YouTube search autocomplete: start typing a topic and YouTube reveals what real people search for.
- Suggested and competitor videos: the sidebar beside popular videos in your niche is a map of proven demand.
- Google Trends: a free way to spot rising topics and seasonal timing before you commit.
- Your own comments: the questions your viewers ask are pre-validated video ideas.
Dedicated and Free InstantViews Tools
Browser extensions and SEO suites layer search-volume estimates, competition scores, and tag suggestions on top of YouTube. They are useful as you scale, but you do not need a paid subscription to start. InstantViews offers free research and optimization tools that help you validate a topic, refine a title, and check your tags before you publish — so you spend your effort on videos with a real chance of being found.
Analytics: Knowing What to Fix Next
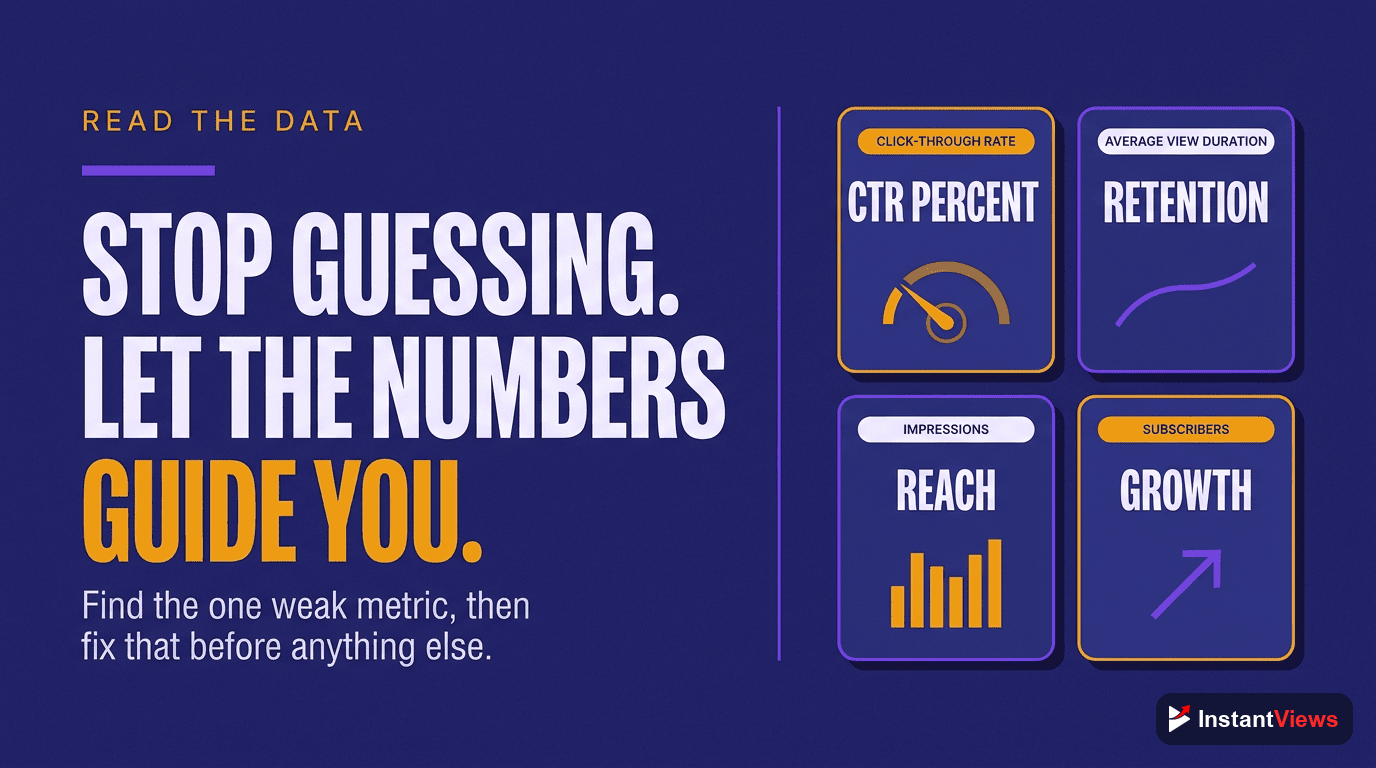
Analytics is the feedback loop that turns guessing into improving. You do not need a paid analytics platform to begin — the analytics built into YouTube Studio are free and tell you almost everything a new creator needs to know.
The trick is to ignore the dozens of metrics and focus on the few that map directly to a fix:
- Click-through rate (CTR): judges your title and thumbnail. Low CTR means your packaging needs work, not your content.
- Average percentage viewed and the retention graph: judge your content and pacing. Look for the exact moment viewers drop off and fix that section in your next video.
- Traffic sources: show whether you are being found through search, suggested videos, or browse — each rewards a different approach.
- Returning viewers and subscribers: tell you whether people want more after their first watch.
Read your retention graph after every upload and ask one question: where did people leave, and why? That single habit improves your videos faster than any piece of equipment. Third-party analytics tools add competitor benchmarking and historical tracking later, but the free Studio data is where every creator should learn first.
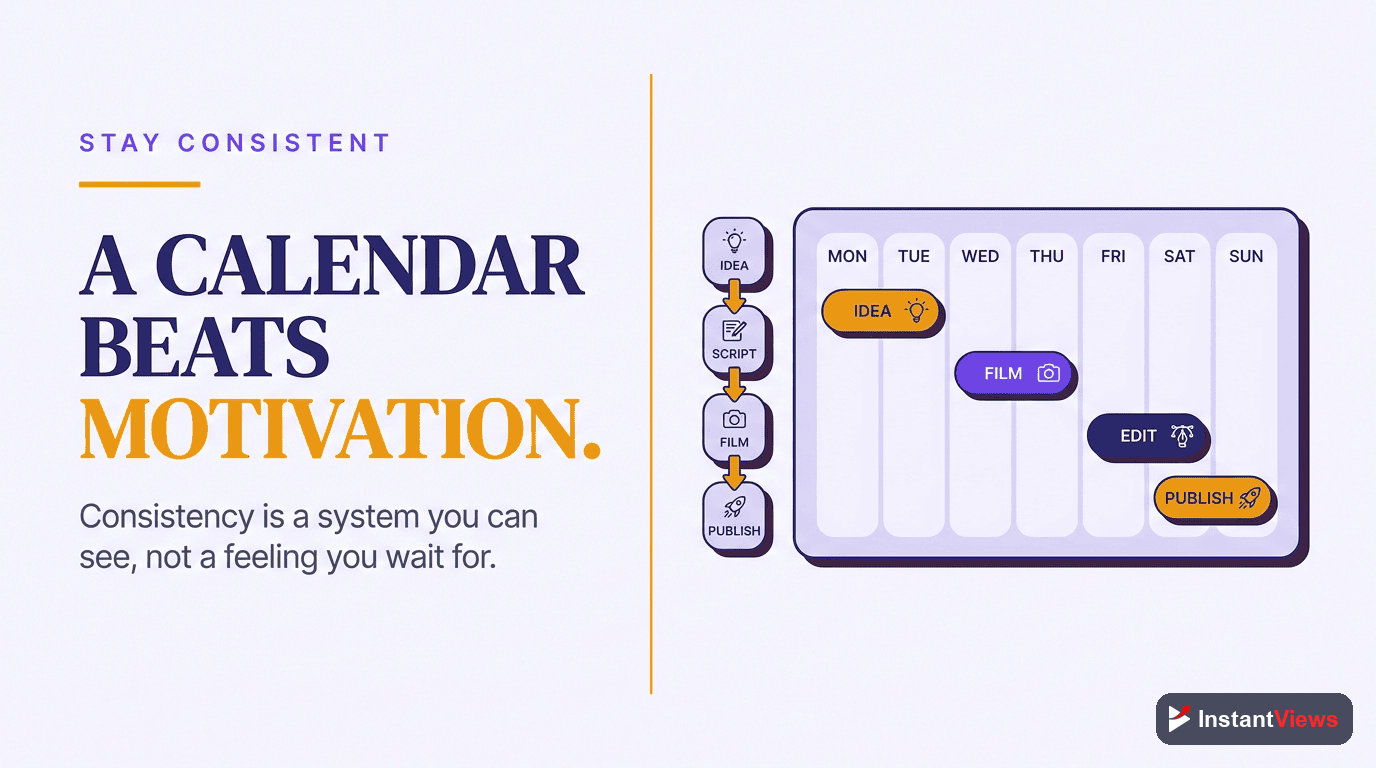
Organization: Your Content Calendar
The most underrated tool in any creator's kit is not gear at all — it is a system that keeps you publishing consistently. Because the algorithm rewards steady output and the audience relationships that build over time, consistency quietly out-performs production value. A content calendar is what makes consistency possible.
Your calendar does not need fancy software. A simple spreadsheet or a free task app is enough to track each video from idea to publish:
- Idea bank: a running list of topics drawn from your research and viewer questions.
- Pipeline stages: idea, scripted, filmed, edited, scheduled — so nothing stalls.
- Publish cadence: a realistic, repeatable schedule you can actually sustain.
- Batching: group similar tasks — film several videos in one session, edit in another — to save time.
A calendar also removes the daily "what should I make?" decision that drains energy and stalls channels. When the next three videos are already planned, you spend your creative energy making them instead of choosing them.
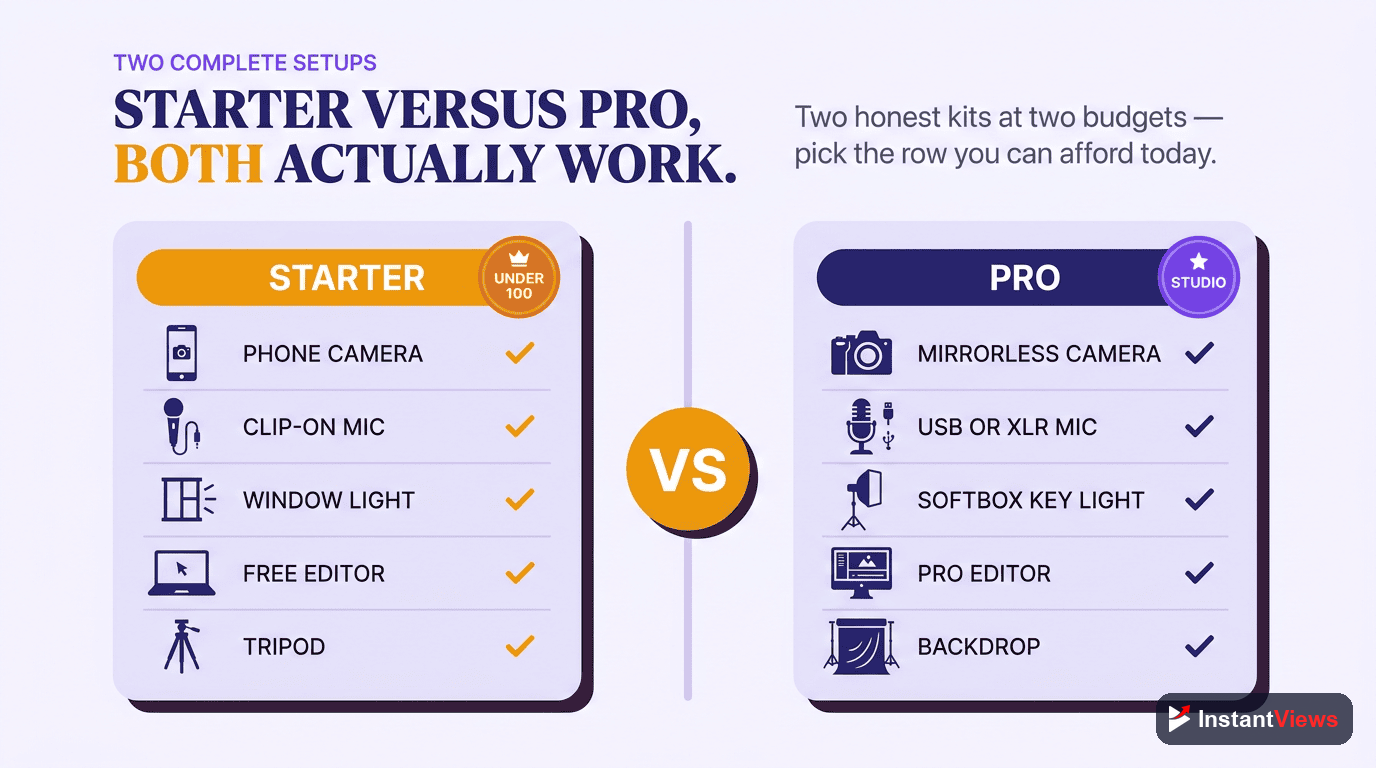
Starter vs Pro: Two Complete Setups
Let us pull everything together into two complete, realistic setups. The starter setup proves you can publish for almost nothing; the pro setup shows what you might grow into — never what you must buy on day one.
| Category | Starter (budget) option | Pro (upgrade) option | Why it matters |
|---|---|---|---|
| Camera | The smartphone you already own | Mirrorless camera or quality webcam | Image quality is "good enough" on a phone; upgrades add blur, low-light, and lens control. |
| Audio | USB condenser or clip-on lavalier mic | Shotgun mic with an audio interface | The highest-impact upgrade — clear sound is what viewers actually notice. |
| Lighting | A window, or one affordable LED light | Two or three-point controllable kit | Light separates you from the background and makes any camera look better. |
| Editing | Free editing software | Prosumer or pro editor with AI features | Free tools publish polished videos; paid tiers mainly buy speed. |
| Thumbnails | Free template-based design tool | AI generation plus A/B testing tools | Thumbnails turn impressions into views — design beats software. |
| Research / SEO | YouTube autocomplete, Trends, free tools | Paid SEO suite or browser extension | Choosing topics with demand beats perfecting topics nobody wants. |
| Analytics | Free YouTube Studio analytics | Third-party benchmarking platform | Retention and CTR tell you exactly what to fix next. |
| Organization | A simple spreadsheet or free task app | Dedicated calendar / project tool | Consistency compounds; a calendar makes it repeatable. |
Read the starter column again. Almost every entry is free or nearly free, and that column alone is enough to build a real audience. Now here is how to assemble it, in order of priority:
Set Up Your Camera
Mount your phone on a tripod, lock focus and exposure, and frame yourself at eye level. No purchase required — just position and stability.
Fix Your Sound First
Add a simple external microphone and record in a small, soft-furnished room. This is the one early upgrade worth prioritizing because viewers notice audio most.
Light Your Scene
Face a window or add one affordable light in front of you. Make sure the light falls on your face, never behind your head.
Edit and Package for Free
Cut tightly in a free editor, add captions, then design a bold thumbnail in a free template tool. Packaging earns the click.
Research, Publish, and Review
Validate your topic and title with free research tools, publish on a steady cadence, then read your retention graph to plan the next video.
"The best camera is the one you already own, and the best tool is the next video you actually publish. Gear is a multiplier — but it only multiplies the consistency and ideas you bring to it."
Frequently Asked Questions
Far less than most people think. A modern smartphone shoots excellent video, so your first priority should be sound, not the camera. A simple external microphone, a window or an affordable light, and free editing software are enough to publish professional-feeling videos. You can upgrade everything else later once you know your channel will last.
For most creators, yes. Recent phones record sharp, stabilized footage that looks great on screens of every size, and many successful channels are shot entirely on a phone. Lock your exposure and focus, shoot in good light, and you will rarely notice the difference between a phone and an entry-level dedicated camera.
Viewers will forgive slightly soft footage, but they leave almost immediately when audio is harsh, echoey, or hard to understand. Clear sound signals quality and effort to the brain before a single word lands. That is why a modest microphone upgrade improves perceived production value more than an expensive camera ever will.
No. Free editors handle cutting, titles, music, and exporting more than well enough to publish polished videos for years. Prosumer and professional tools mainly add speed, advanced effects, and time-saving AI features. Start free, and only pay for an editor once a specific limitation is genuinely slowing you down.
Start with free sources: YouTube search autocomplete, the suggested videos beside competitors, and Google Trends for seasonal demand. Dedicated browser extensions and SEO suites layer on search-volume estimates and competition scores. InstantViews also offers free research and optimization tools so you can validate a topic and refine titles and tags before you publish.
Thumbnails are arguably your most important asset because they decide whether your impressions ever become views. You do not need professional design software — a free template-based design tool lets anyone produce bold, readable thumbnails. Keep them simple, high-contrast, and legible at a small size, and test variations whenever a video underperforms its potential.
Begin with the free analytics built into YouTube Studio. Watch click-through rate to judge titles and thumbnails, average percentage viewed and the audience-retention graph to judge your content and pacing, and the traffic-source report to see how people find you. Those few metrics tell you what to fix next without any paid tools.
A starter setup is a phone, a budget microphone, natural or one-light lighting, and free software — enough to publish consistently for almost nothing. A pro setup adds a dedicated camera, a better microphone and audio interface, a controllable lighting kit, and paid editing plus research tools. The jump is about speed and polish, not about whether you can succeed.
Conclusion
The complete YouTube creator's toolkit is far smaller, and far cheaper, than the internet wants you to believe. A modern phone, a simple microphone, a window or one light, and free editing, thumbnail, research, and analytics tools are genuinely enough to publish videos that look and sound professional — and to build a real audience while you do it.
Spend on the things viewers actually notice, in order: audio first, then lighting, then editing speed, and only later a dedicated camera. Upgrade one tool at a time, and only when a specific limitation is holding you back. Every dollar you save by starting lean is a dollar you can reinvest once you know your channel is going to last.
Most of all, remember that no tool makes videos for you. The creators who win are the ones who keep showing up with clear ideas, tight pacing, and a packaging that earns the click — on whatever gear they happen to own. Start with what you have, publish consistently, and let your toolkit grow alongside your channel rather than ahead of it.